In 20 weeks
I set out to create 3 vehicles.
An accurate
study of a 1963 Corvette Stingray, a 1940s COE Truck and a vehicle of my
design.
I completed
all 3 of these tasks within the tri budgets and texture budgets.
I believe
that my skills clearly develop throughout this FMP and I am now a much stronger
vehicle artist.
1963
Corvette Stingray

Choosing a vehicle, purchasing a model and sculpting in the
initial forms.
This project was my first foray into Sub D work flow so
there was allot to learn. After getting
to a point where I was happy with the Shell of the car I could begin to cut out
various panels. I could then begin to add bumpers etc.
I
now know that many forms should not be modelled during Sub-Division, It can be
allot easier, more efficient and it can yield better results to wait unto after
Sub-D to model in many of the smaller forms. Sub-D should just be used for the
initial sculpted shell of the vehicle. During this project I did not know this
and I tried to model the entire vehicle whilst Turbo smoothing. This held me up
greatly when it came to tidying up the vehicle and general retopologising

Further
dressing of the vehicle

Throughout this process I am altering many elements of the
mesh to fix shading errors.

Once I had finished the car and it was shading correctly I
then began texturing. My mentor did some quick renders of the car with a highly
reflective surface to point out some reflection errors at this point. At the
time I wasn’t aware of how dramatically Brocken reflection could be on a mesh
that appears to shade correctly. This was the hardest part of the project.
Getting accurate reflection requires consistent quaded, neat and flowing
geometry. This is difficult to achieve when you have complex forms within which
are cut-outs.

Here I am baking down many areas of the vehicle as well as
fixing some of the reflection errors. The last screen shot here shows the many
different variations of mesh I went through in my attempts to fix some of these
errors.

Finished
Vehicle
I am actually very happy with the final outcome. As my first
vehicle project of this type I am very pleased with the forms of this model. I
feel that I have accurately captured the lines and proportions of a 1963
corvette Stingray.
I can see issues with certain creases which a far too sharp.
Also I do feel the interior is poorly modelled in that it isn’t as accurate as
the exterior. Also the interior is extremely poorly textured. All these issues
are due to the unscheduled faze of retopolagising to fix reflection issues. I
don’t feel that this was wasted time as this is an area I really needed to
build skill and understanding in. I still have a lot to learn in regard to the relation
between functioning accurate reflections and geometry, and how to create this
kind of geometry.
This issue actually is the cause of other issues with the
final vehicle. Although I spent allot of time trying to fix the reflections,
areas of the car still have issues. This is why the finale paint texture isn’t
glossy realistic car paint. I have deliberately made the car unreflective.
Although I do like the surface quality this has given the
final renders.
I have learnt allot during this project. I can now much more
accurately capture the forms, lines, proportion and creases of a vehicle. I have
learnt how to then create different body panels, model details into these
forms, include an interior, fix shading errors via editing normals and
geometry, fix some reflection and This
is the first project during which I have used Marmoset.
If I was to do this vehicle again now I would model it
differently from the start. I would collapse the Turbo smooth modifier allot
sooner and then model in the vents. I would also adjust the mesh as little as
possible as to try and keep as much of this original geometry as possible. This
should help with getting better reflections. This though may result in a much
higher budget car. So in regards to creating a vehicle with the same budget I
would have to simply apply less multiplications of Turbo Smooth and maybe forgo
some of the cars complex details.
I would also research how to create realistic car paint
shaders.
I still have allot to learn in regards to geometry and how
this affects lighting and reflections.
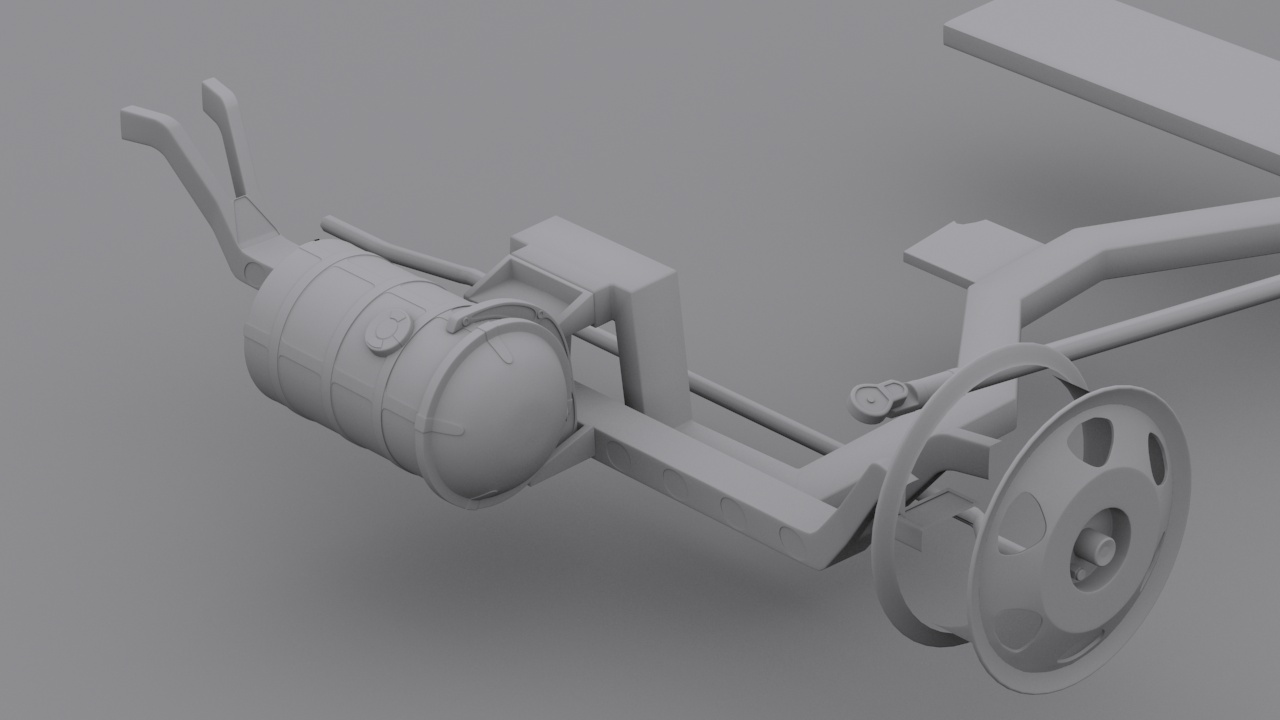
1940 Lifted COE Truck

I began this project by buying a model of a 1940s 4 wheel
drive military truck. I also studies modified leaf sprung off road vehicles.
This was so that I could accurately create a working and period appropriate
chassis. Also as I was going to further alter the stance of the vehicle in
order to make it much more aggressive, I could now realistically add my own
modifications to the chassis and suspension.
This vehicle was very much a mechanical study.


Finished Truck

Again I am happy with this vehicle. I completed what I set out
to create.
What has surprised me is how the design doesn’t actually
quite work. I believed when choosing this vehicle that it would be
intrinsically cool. I didn’t do any design I simply found some good ref for a
1940s American COE truck, this in itself was an awesome characterful vehicle, I
then though that lifting it and adding huge off road tyres could only add to
its presence. Sadly this hasn’t actually translated into the finished renders.
I believe this to be down to the trucks silhouette. It’s extremely simple. With
game art assets we are used to extreme overly designed vehicles, even though
this truck would look awesome in real life when standing buy it. As a render of
a digital model your comparisons are with the extremes of the gaming world, and
it falls short.
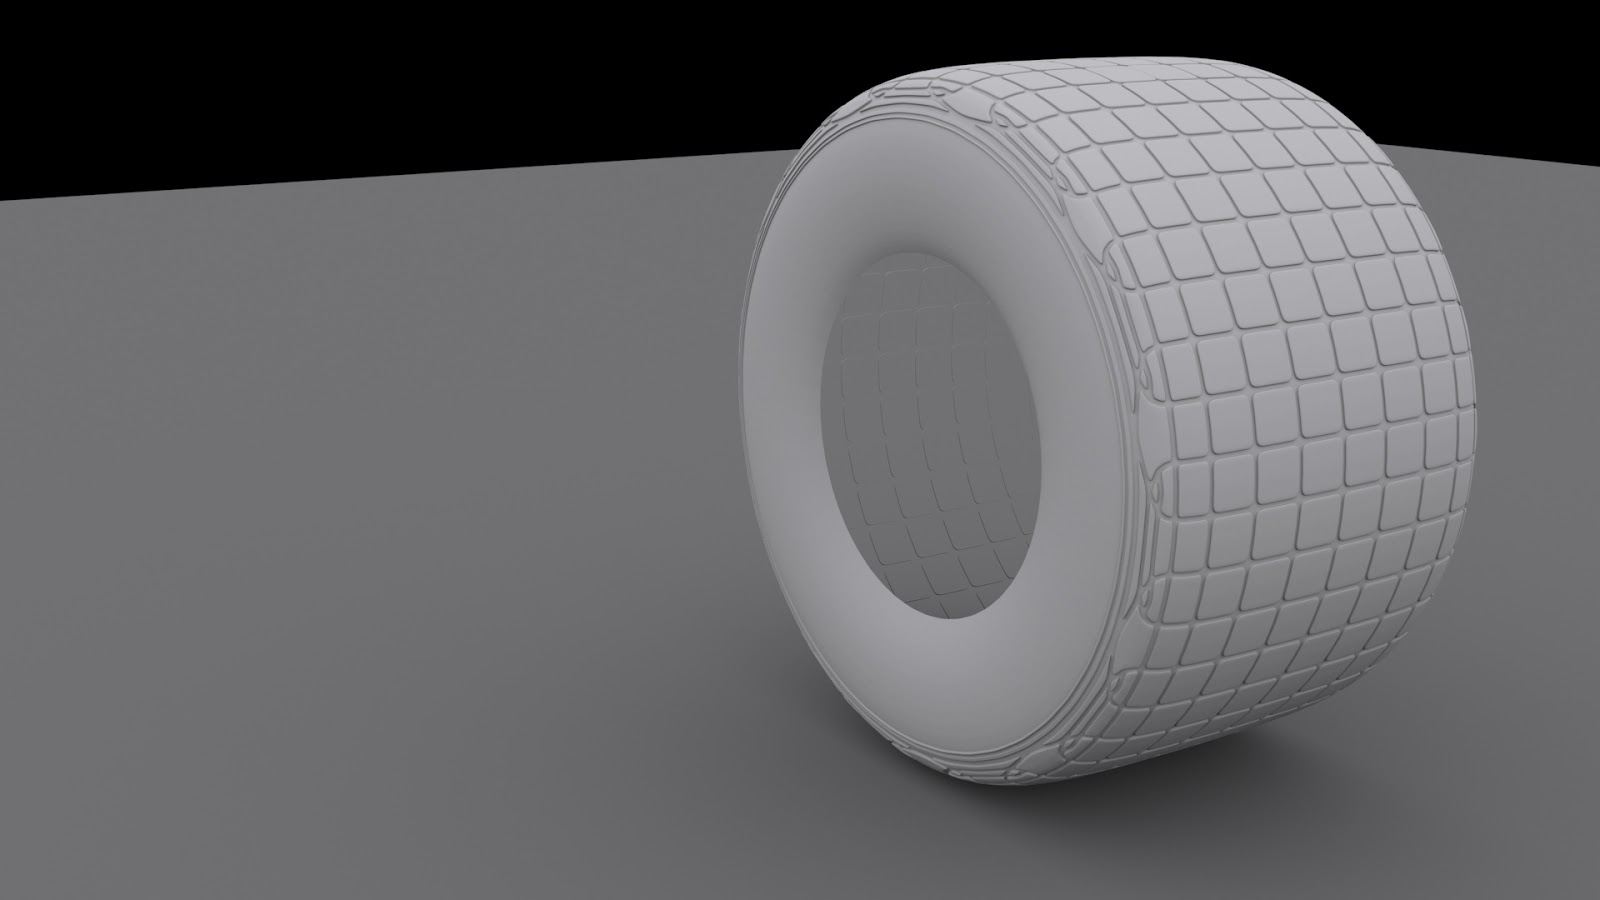
I
am happy with modelling and texturing. I believe during this project I
developed allot in substance painter. I believe the wheels in the renders are
to a very good quality. This is down to creating a high quality low poly, which
I made in Z-Brush and then Decimated. The high poly was then baked onto this.
This in conjunction with the average normals work flow has created what I
believe to be a high quality tyre
In regards to the presence of the vehicle I believe the
inclusion of a floor plain could have really helped. The truck actual has allot
of rake and this is hard to see in the render because of this.
If I was to do this vehicle again as well as the alterations
I have already suggested I would physically model the doors. Physical geometry
due to casting dynamic shadows/lighting etc, will always look better than
normaling the information. Also I would model damage into the mesh. This is
something which I will definitely take forward into future projects. Wear and
damage up to this point I have always added during texturing, this doesn’t have
to be and shouldn’t be the case.
This vehicle could also do with Decals/Stickers/graffiti to
add character and a personal touch. This would also add colour/tonal variation.
Although the bed of the truck is missing this area could
still be used to add character to the vehicle. I could have added personal
belongings of the owner/ suggestions of its use and or the environment that the
truck exists in. All these features are not on my truck because I never did a
design pass, I simply recreated my ref.
Now that I have finished my FMP I now know that when
creating your own vehicle design you have to approach it with the same
incredible detail as a character artist. I should have asked some core fundamental
questions what, where, when, who, why and then my design should be able answer
these. This would create a vehicle with character and depth.
Designed Vehicle
This is my 3rd and final vehicle. I have already
learnt allot at this point and I believe this is evident.

This vehicle needed designing. I began by collecting a vast
amount of reference. I had no prior perceptions of what this vehicle should be
so this was anything that I was drawn to.
I then overlaid these images and then drew over the top. The
example of this above is mostly many overlaid images of engines. I found this
to be occasionally extremely successful and I would quickly create a few
designs that I would want to take further. Sometimes this method would produce
no real results.
I quickly found that I was drawn to a particular theme. This
was to adhere huge amounts of complex, mechanical, ambiguous forms to a
relatable streamlined vehicular form. Thus creating something extremely
complex, relatable with purpose and yet alien.
After
a period of time designing I decided to try designing in 3D space, in 3DS-Max.
I picked my most successful design at the time and began to model and try to
make sense of my extremely vague designs. I had begun this during the truck
project, after putting time into this vehicle I felt like it was working and
simply made it the finale design. This was going to be the finale vehicle of my
FMP.

I began by making the cab of the vehicle as this was the most
important form. This immediately appeared to be a really successful design.
I quickly decided that it would be important to ground the
vehicle by attaching it to a real life chassi. I then put allot of work into
researching 1930 hot rod chassis. I was then going to build the car on top of
this. I really liked the idea of this hyper futuristic tech being bolted to
this ancient 1920/30 tech. This is actually exactly what hot rod culture is
doing today. It’s common with modern day Hot Rods to have the exact
underpinnings as they would have had 60 years ago the main change will be a
modern power train with modern induction and modern paint. My design is simply
this idea but in the distant future.

I was really happy with the design at this point. But I was
having a lot of trouble with the back of the car. I knew I needed something
here I just didn’t know what and how much.

It was at this point that I realised the relation between
good vehicle design and character design. But I was well into this project so I
couldn’t push the design too much and or get too detailed with my ideas. This
though did at least make me think creatively when strapping the piece of
unknown possibly alien tech to the back of the car.
Looking back now I believe this area could have been pushed
allot further using the thought process above.

Now that I had finished the base mesh I had a hell of allot
of high polies to make and allot of baking to do. I was determined to bake
detail onto every single surface.
I began baking using X-normal and then learnt how to bake in
Substance Painter.
Above you can see the extent of my baking.
Now that I know how to bake complex meshes in substance
painter I could complete this process much faster. This also means that I could
also put more care and attention into the high poly details and thus create
better designs.

This turned into an extremely complex substance file. Again
I’ve come along way in substance and I’ve learnt the hard way about its
capabilities. I was really trying to push my texturing, for example there are 4
shades of paint on the cab of the vehicle. Obviously the top of the cab is pink
and then the underside is blue, but the extremes of the top of both these
colours have a sun bleached variant. I did this by manipulating masks that used
the world space normals.
This vehicle is meant to appear as a ramshackle of unrelated
and repurposed parts. And I believe for the most part I have achieved
this.
During what was meant to be my last day of texturing for
this vehicle my substance file became corrupted. This was possibly as a result
of the sheer size of it. I now know that I should have Brocken the vehicle up
into areas of similar texture quality. This though was my first corrupted file
of this degree (not including Unreal files).
Because of this I lost a day of progress and I also lost a
day trying to recover files. This all happened in the last week. But I still
managed to complete the vehicle, this if anything only altered when I would
begin this post mortem.
Finished Vehicle

I am extremely happy with this vehicle. I am mostly pleased
the design of the cabs form and it’s texturing.
I’m also surprised with the success of the colours, I felt
that I was taking a risk; initially I planned to just use dark moody metal
tones with maybe some colour highlights. But I ended up using two extremely
bright and playful colours on a large amount of the vehicle. I believe this may
differentiate this vehicle from allot of vehicle art, it also grounds the
vehicle as being domestic. It could have easily have ended up being some kind
of military/dark underground cliché themed death car. I believe good design
doesn’t need to have guns and or kill people to be cool. Because of this I did
try and stay away from obvious use of weapons during the design process.
Again I believe this vehicle is in need of a floor plain for
the same reasons as before. It could also do with more stickers etc on the cab.
If I was to do this vehicle again I would more solidly lay
down some of the designs before I commit to them. The interior was made up on
the spot and this was the first iteration of it. As a result it suffers. Some
of the features of it are only thought through in the texture and aren’t
present in the geometry. The area behind the seat is meant to be soft rubber
yet it has a hard edge due to this. This is a case of designing on the fly,
this method shouldn’t be planned in as it will never yield the most successful
thought-out results.
I’m at a point now where I feel I have a vehicle art
portfolio that is ready for applications. Although I can see issues with all of
them I believe this will always be the case and if I keep waiting for a project
to be “finished” I may never start applying for jobs.